
Products used:
– Michaels wooden crates
– Foam brush
– Light sand paper
– Dark Walnut wood stain gel
– Varathane sealing spray
I started off doing one crate and let the gel stain sit overnight for a very dark look. The next day I wiped off the excess stain gel with a cloth. The stain wasn’t exactly what I had wanted at first but it had a rustic look to it so I was alright with it. The next few crates I did a light sanding to let the stain soak in a bit more as I think they must spray something on the crates after they’re made. Also to remove any unwanted markings such as chalk or stamp marks, sand the wood a bit more. Smooth the edges of the wood with sand paper too to avoid any slivers.
Next step is to use the stain gel with the foam brush. I started on the outside of the crate so that the crate could sit upside down to dry without ruining the stain. I put the stain on heavy so that it would really soak in. Make sure you get every nook and cranny because the crates are a very light wood colour to begin with. Then as I did with the first trial crate, I let them soak in overnight.
After having the stain set in for about 24 hours, I took a rag and wiped down the crates. At this point the crates turned out a bit splotchy. So for the inside of the crates all I did was put on the stain with the foam brush and wipe it off with a rag a few minutes later. It was almost just as dark but not blotchy at all. So if I were to redo the boxes, I would do it this way first rather than have the crates sit overnight. Also make sure that you have sanded all the edges as I got a nasty splinter when rubbing the cloth on a crate.
Ok so after letting the crates fully dry, make sure they’re not sticky or tacky. Next is to put some sort of sealant on the wood so that the stain doesn’t go weird or anything. In the past when I’ve done other projects, I’ve used a spray can sealant and it’s turned out great. Just make sure to do the spray outside and to put the crate on something that it doesn’t stick to after being sprayed.
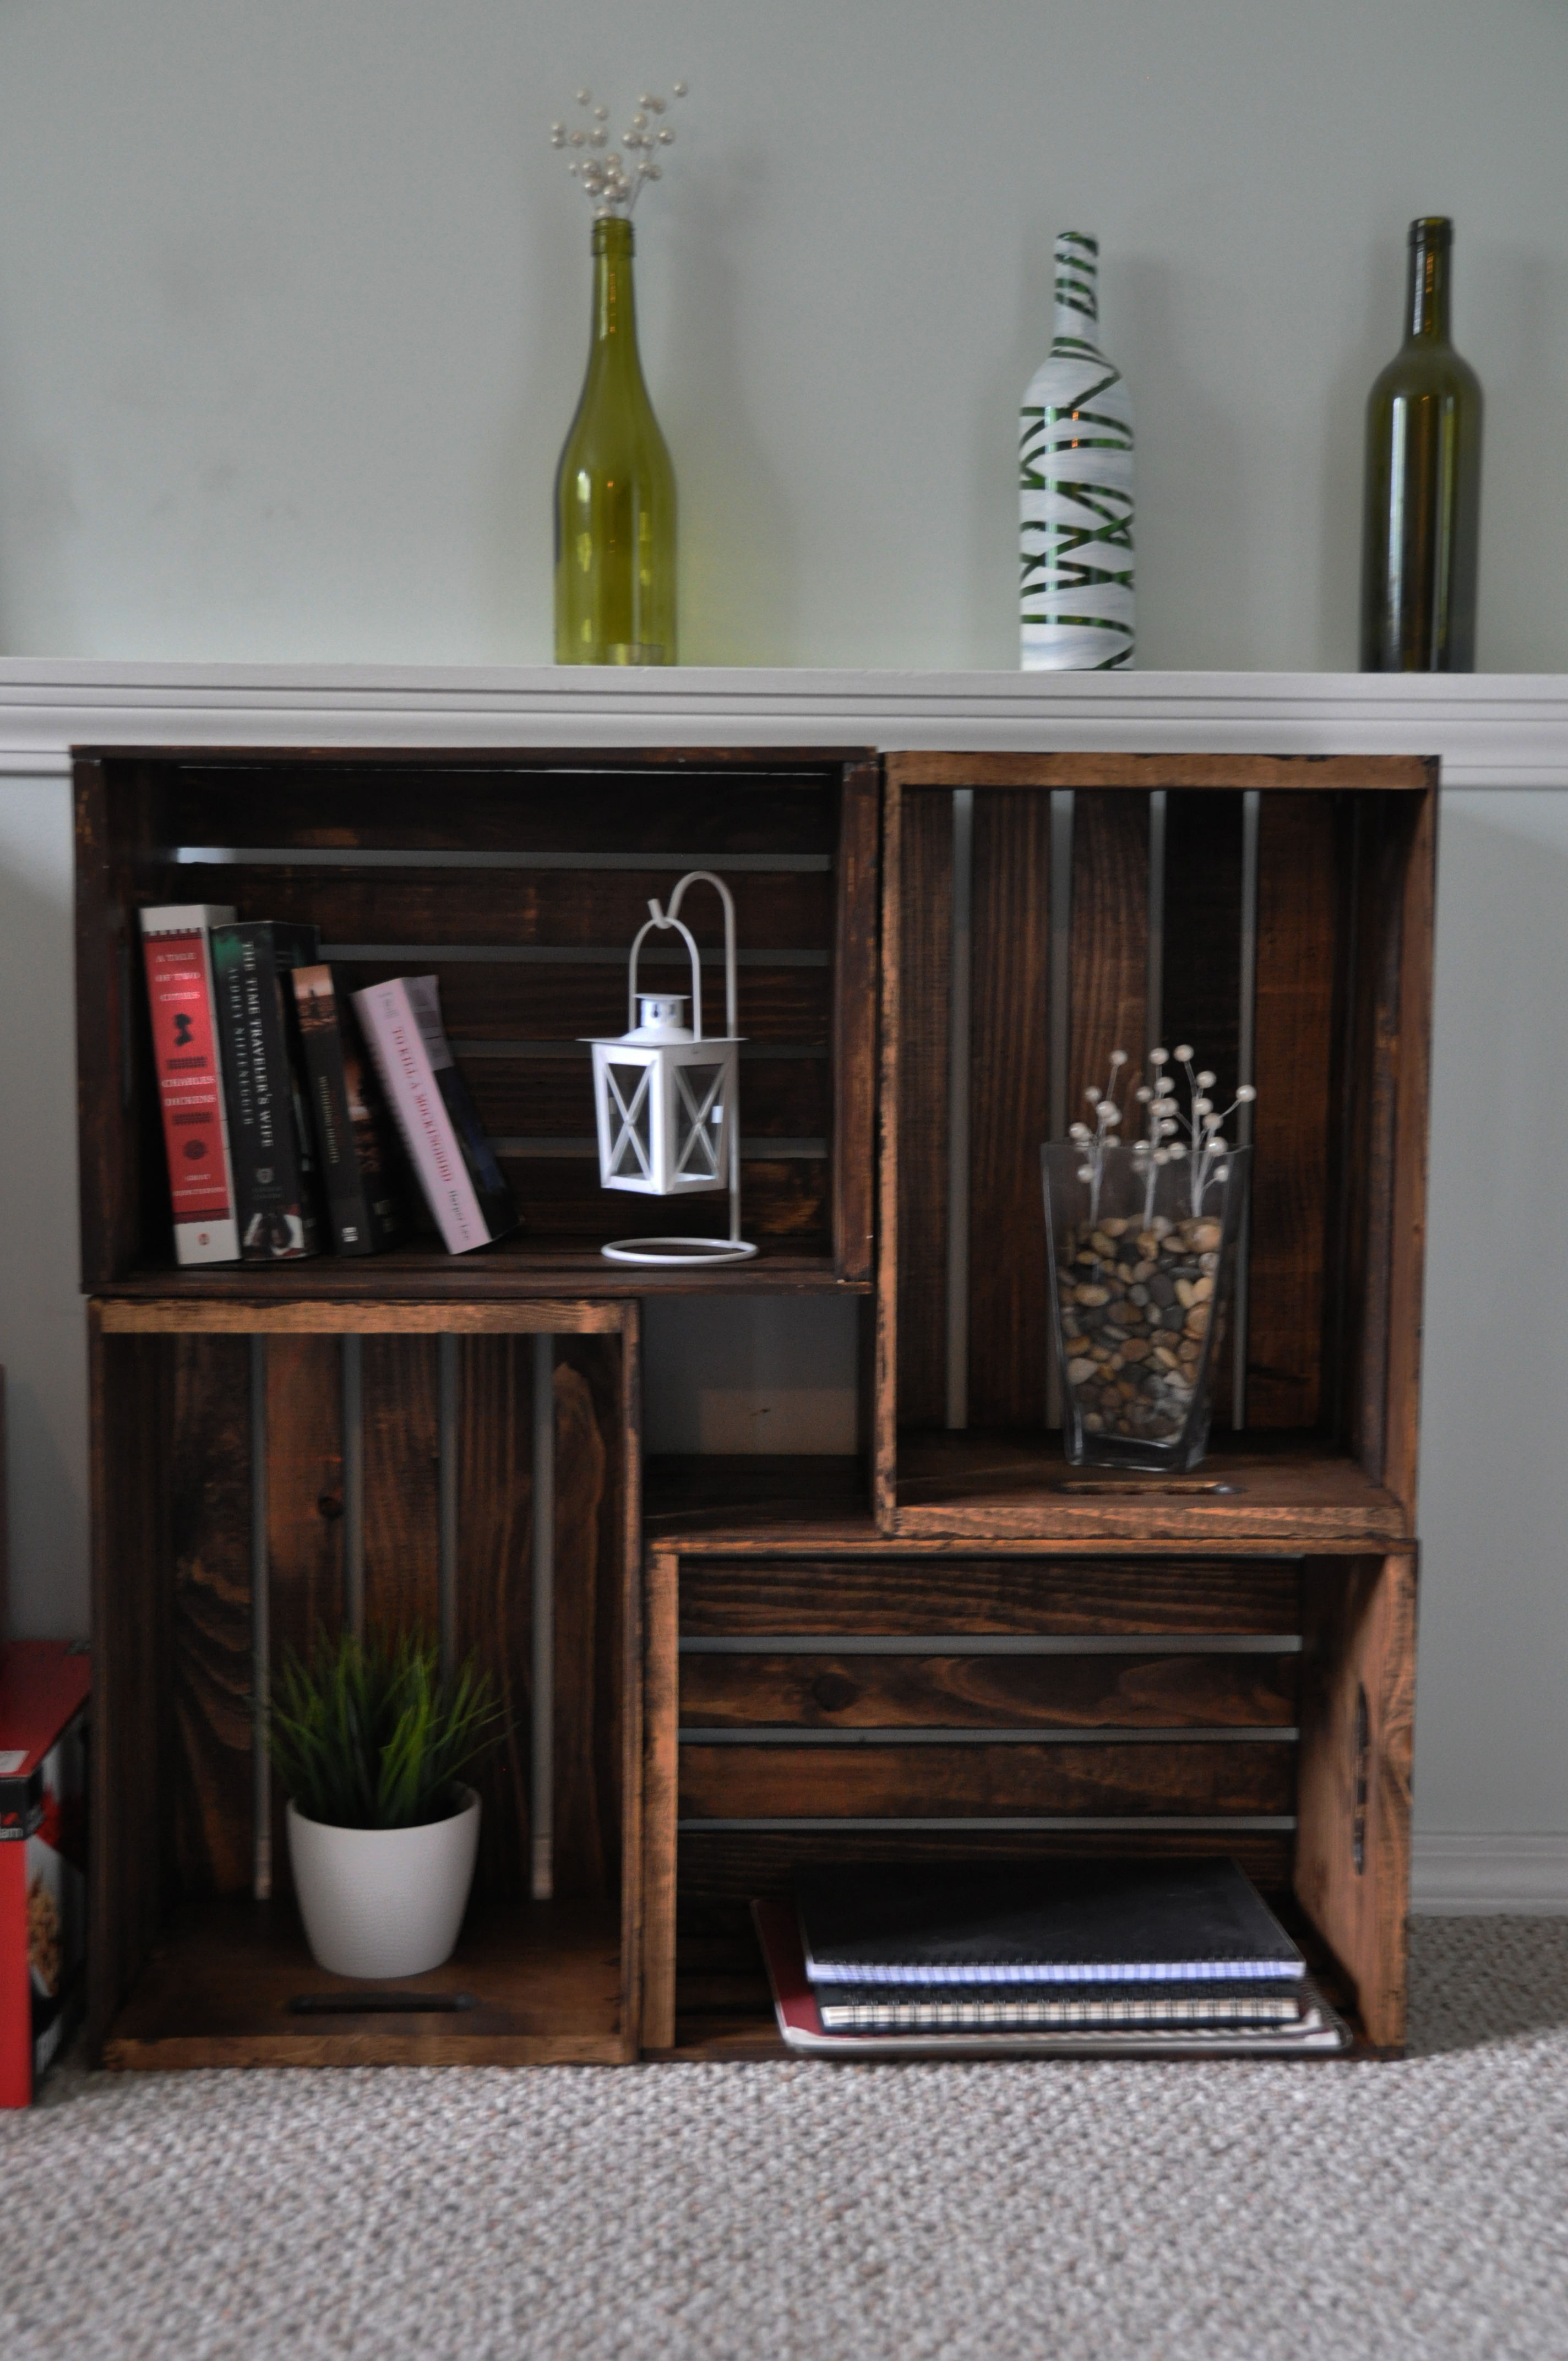
I let the crates sit for another 24 hours before setting them up in the arrangement I wanted. There are many different ways to set up the crates for bookcases and such. I would suggest trying a few different ways to figure out which way you like then nail them together if you’ve got heavy items to go in the crates. Right now I have them sitting without being nailed together and they’re just fine. This way I can always change up the layout.
I really love the way the bookshelf turned out and wish I had more room to make more crates for a longer or taller bookcase! Have fun trying this one out!
Before:

After:


I love this. I want to make a coffee bar / center but would like to know the height of the unit made. I do realize it can go higher or longer. Is it sturdy enough to put an average Keurig machine on it?
The unit is about 3 feet high. Each individual crate is about 1′ x 2′. It is quite sturdy when placed in the square formation.